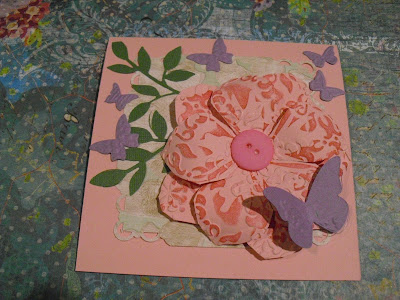
Good Monday morning! I had a wonderful weekend ending with a girl's night out with my daughter last night. We went to see the Barry Manilow show at the Paris Hotel, for the second time, and it was just as good as the first time. Came home and quickly worked on this card. Hope you like it.
The Build A Blossom set is in the Stampin' Up Occasions Mini Catalog on page 12. The coordinating Blossom Petals Punch is sold separately. To make the flower you use the two-step stamping. I stamped the petals ten times.
Unfortunately, I have not bought the Blossom Petals Punch yet, so I had to cut the petals with scissors. But the punch is on my wish list and I will be getting it soon.
Punch a 1 1/4" circle and glue five of the petals to the center of the circle.
With a pencil or stylus curl each of the last five petals and glue in-between each of the bottom layer petals.
Stamp the small circle stamp from the set and punch it out with the 1/2" circle punch.
Glue to the center of the flower and add a dab of crystal effects. Or you can use a button or brad.
I embossed the base of the card with the Tulip Frame embossing folder. Cut a piece of Tempting Turquoise cardstock (CS) and placed it in the center.
I used the Little Leaves sizzlits die and made a pretty bow with the Chantilly crochet trim by Stampin' Up.
Decided to make another, but this time I embossed the Pretty in Pink CS with the Vintage Wallpaper embossing folder first. Then I stamped the petals and again had to cut them with the scissors. I'm hooked on this beautiful flower, so my Wish List item just became a reality and I ordered it.
Come back again and see how I make this flower when I get my new punch.
Monday, February 28, 2011
Subscribe to:
Post Comments (Atom)


1 comments:
Beautiful
Post a Comment